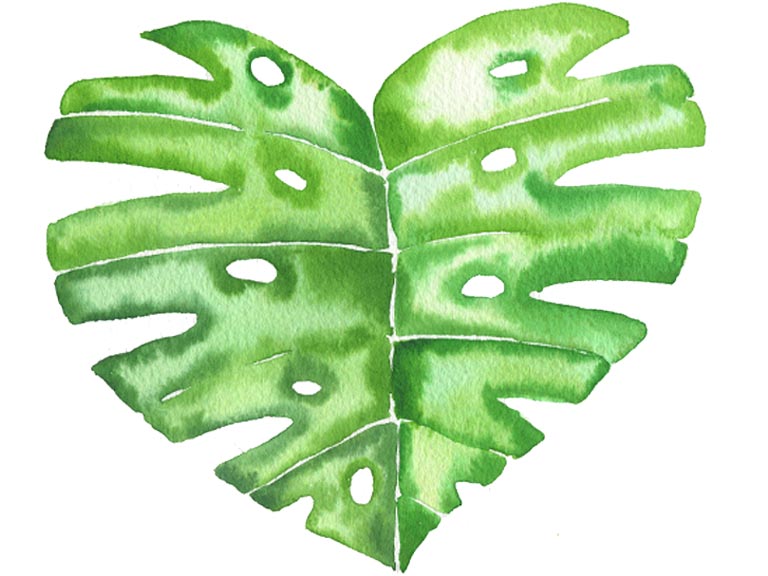
Monstera leaves are some of my favourites to paint in watercolour. They have big architectural shapes and a lush green colour that makes me feel like I’m in a rainforest. Monstera leaves are also much easier to sketch and paint than you think. Please don’t be put off by the sketch, I’ll take you through it step-by-step!

What supplies you will need
- Watercolour paper (I prefer cotton but whatever you have to hand)
- Watercolour paints
- Brushes (medium and small for details)
- Water jars with clean water
- Paper towels or cloth to dry your brushes
- Pencil and eraser
Monstera colours
Choose any colours you like – greens in your palette, or mix them with blues and yellows. Here’s what I’m using, from the Winsor & Newton Professional range:
- Sap Green
- Hooker’s Green
Painting a monstera leaf – step by step
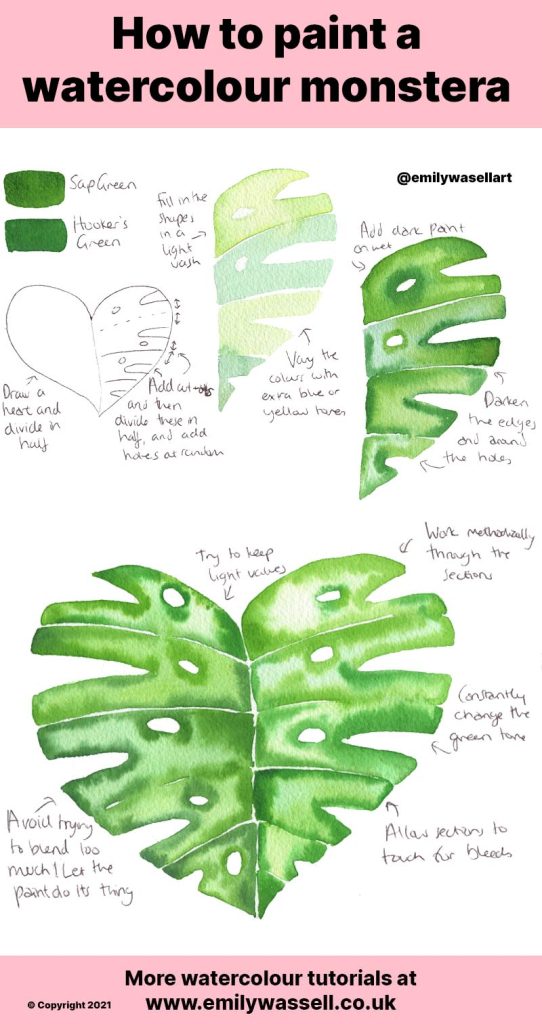
- Start with the sketch outline. Draw a large, rounded heart shape – don’t worry about making it symmetrical! Draw a centre line and then add more lines coming out from the centre to the sides, dividing it into sections. In the centre of each section, create a small curve where the leaf will cut in, and add holes in random places.
- Run an eraser over your pencil lines to ensure they’re faint, or they’ll show through the watercolour.
- Mix up a light, watery green colour and load up your watercolour brush. Outline the first shape in the top corner in a light wash. Using a slightly different colour, outline and fill in the second shape underneath it, leaving a small white line to keep them separate. You need to work quickly while they are still wet.
- Grab a darker colour and touch your brush around the edge of the wet shape, allowing the dark colour to spread and bleed out. Avoid blending with your brush and just let it bleed naturally. Use a thick mix of paint to stop it spreading too far.
- Continue this down the first side of the shape, varying between blue-green and yellow-green tones to keep the contrast high. Make sure you’re outlining the holes with a daker colour, and make the centre and tips darker too, to make the leaf look three-dimensional.
- Continue working on the other side, constantly changing the green colour. Make sure there are plenty of light areas as well for contrast. You can also occasionally let the sections touch in places for fun little bleeds.
Now you know how to paint a monstera leaf in watercolour! Add more leaves to make a monstera pot plant – happy painting!
Want to learn to paint more leaves? Take my free watercolour masterclass on painting leaves.
More tutorials
Download my free watercolour supply guide
Feeling overwhelmed and confused by watercolour paints, papers and brushes? Download my free guide filled with insider info, including a list of good supplies for every budget, and my complete supply list!
