Toadstools are one of my favourite features in a forest. It feels like finding a prize, spotting their little red and white caps on the woodland floor.
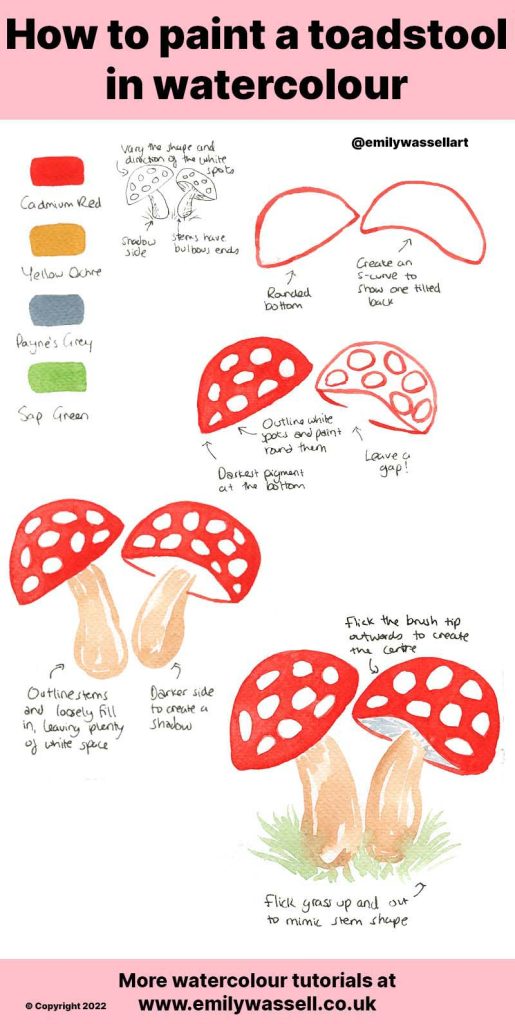
They’re really striking to paint in watercolour, as long as you use the rule of leaving white space for the spots on top. We’re going to paint around those areas, instead of adding white on top.

What you will need
- Watercolour paints
- Watercolour paper
- A brush
- Jars of water
- Paper towel
Colours you’ll need
- Cadmium Red
- Yellow Ochre
- Payne’s Grey
- Sap Green
All the watercolour paint I use is the professional paint range from Winsor & Newton. Don’t worry if you don’t have these exact colours – find the closest match in your palette.
Paint a toadstool step by step
- We’re painting two, leaning away from each other. Start by outlining the caps with a rounded top and curved bottom. Leave a gap in the bottom of the second for a stem.
- Using the tip of your brush, outline the white spots in red paint. We’ll be leaving that paper clear and painting red around the spots. Fill in both toadstool caps with red and add the darkest paint at the bottom for a shadow.
- Using a light yellow-brown, outline the stems. They are thick and have rounded, bulbous bottoms. Fill in with paint, leaving white space in vertical lines for texture. Create a darker shadow side.
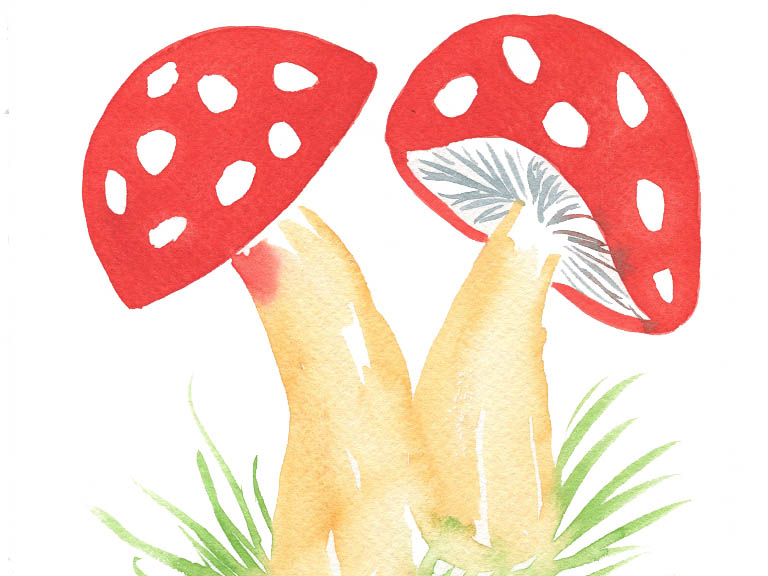
- Finish with some grass at the bottom, and then mix up a light grey with a fine brush. On the second toadstool, create light flicks under the cap to create texture, all emanating from the stem outwards.
And you’re done! This is four easy steps to paint a stunning toadstool.
More woodland tutorials
Download my free watercolour supply guide
Feeling overwhelmed and confused by watercolour paints, papers and brushes? Download my free guide filled with insider info, including a list of good supplies for every budget, and my complete supply list!
