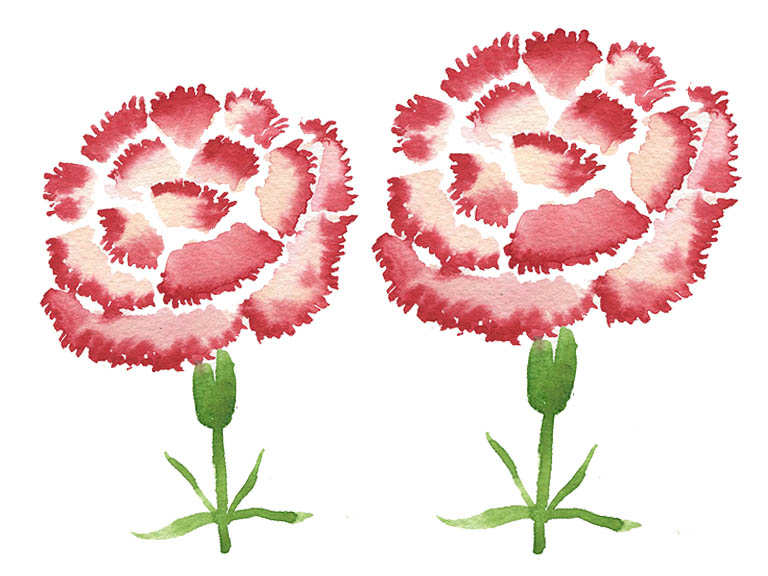
Carnations are wonderful flowers, with their distinctive petals and frilly edges. They are often used to symbolise love and devotion, and make beautiful bouquets.
But carnations are so fluffy and dense that they can seem tricky to paint, with all the petals scrunched in together. This tutorial will show you how to create the flower in rings, with the right separation to capture the iconic silhouette without making a big old blob!

What supplies you will need
- Watercolour paper sheets
- Watercolour paints
- Brushes (medium and small for details)
- Water jars
- Paper towels or cloth to dry your brushes
Colours
Choose any colours you like – carnations come in a range. But with this technique I like to use one lighter and one darker colour:
- Sap Green
- Cadmium Yellow
- Winsor Red
Painting a carnation flower – step by step
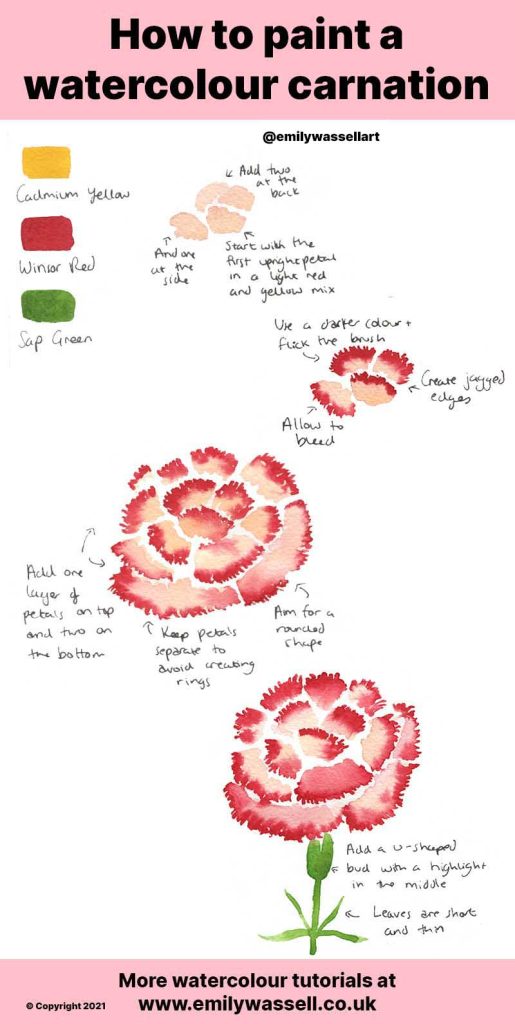
- Start by creating the first petal right in the centre. It will be an upright petal, covering the bud in the centre. You’re creating a small fan, like the ones ladies would use in Spain! Use a light mix of paint (I’m using a watery red and yellow mix) and create a rough edge with your watercolour brush, keeping the shape small.
- Add two other small petals behind the top of your fan, pointing in different directions. Make sure to leave space between your petals to come back with your darker colour for the edges.
- Add one more petal to the side, as if it’s falling down sideways.
- While your petals are still wet, load up a smaller details brush with a darker or richer colour. Place the tip of your brush near the edge of your petal and flick inwards, allowing the paint to touch the wet petal and bleed in. Continue these mini flicks along the outside edge of the petal to create the frilly edge.
- Allow the darker paint to bleed but don’t blend – it works best when it’s allowed to spread on its own. If you use a thick mix of dark paint, it should blend just the right amount.
- Continue painting the petals in a ring, starting underneath. Make the petals longer than the ones in the middle and curve them around the middle bud. Make sure to leave plenty of space between your petals.
- Keep adding your darker colours as you go, while the petals are still wet.
- Add another layer of petals along the bottom to finish the carnation flower.
- For the bud, create a deep U-shape in a green mix, leaving the centre open for a highlight. Then add a thin stem under that.
- Finish with a few long flicks in green to create some leaves and there you have it – a watercolour carnation flower!
More watercolour guides and tutorials
Download my free watercolour supply guide
Feeling overwhelmed and confused by watercolour paints, papers and brushes? Download my free guide filled with insider info, including a list of good supplies for every budget, and my complete supply list!
