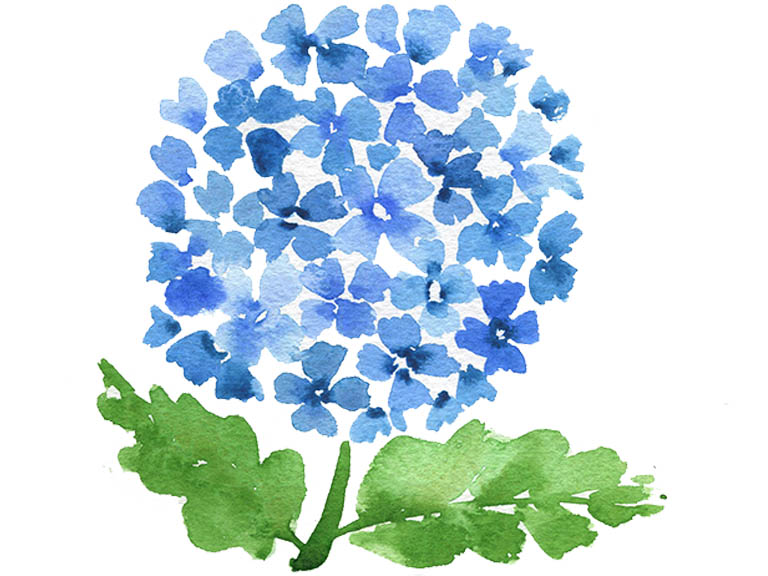
Hydrangeas are some of my favourite flowers! Their huge round blooms light up any shady spot and they remind me of summers in the French countryside.
But painting hydrangea flowers in watercolour can seem complex, because they’re so busy! All those little flower groups overlapping, it’s no wonder many people don’t bother. In this watercolour tutorial, I’m going to reveal my secret to creating these flowers in a loose style without getting overwhelmed, just with a simple motif.
I prefer hydrangeas in blue, but you can paint them in any colour – pink, purple or a cool pale green.

What supplies you will need
- Watercolour paper sheets
- Watercolour paints
- Brushes (medium and small for details)
- Water jars
- Paper towels or cloth to dry your brushes
Paint colours
- Sap Green
- Prussian Blue
- Cobalt Blue
Painting a hydrangea flower – step by step
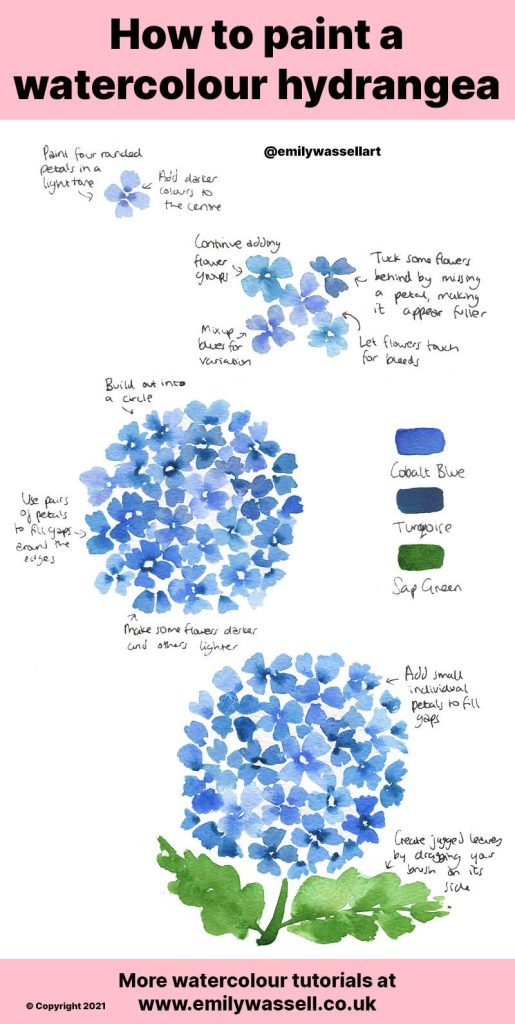
- These flowers are going to be created with a repeating motif of a small four-petal flower. Start with a light blue mix on your watercolour brush and create four small petals, leaving white space between them and white space in the centre.
- Create more flowers in exactly the same way around your first one. Make sure for each flower that you’re mixing up a different type of blue – I’m using a mixture of Cobalt and Prussian Blue. Allow some of the flowers to connect and bleed together and make sure that you use very light blue values too.
- While the flowers are still wet, use a smaller round brush to add a ring of darker paint (I’m using a thick mix of Prussian Blue) in the centre of each flower. Let it bleed out, and pick up any excess if needed.
- If you don’t have space for a full four-petal flower, create smaller two or three-petal versions so it looks like the flowers are tucked behind other ones – this will also make the hydrangea look full and round.
- Keep working outwards into a circle shape. To even out the edges, create pairs or single petals to make it as round as possible, but don’t worry about it being perfect. You can also fill any gaps with a single flower petal too.
- Add your darker circles throughout to create contrast in the flower.
- While the flower dries, create a thick stem in a blue-green paint mixture. Pull out small branches for the leaves, and then create the leaves. Using your brush on its side, drag it back and forth to create the leaf shape, trying to leave some white space in the leaf.
- Create contrast in the leaves by adding darker lines or lifting up some colour to make the paint area lighter. And you’re done!
Download my free watercolour supply guide
Feeling overwhelmed and confused by watercolour paints, papers and brushes? Download my free guide filled with insider info, including a list of good supplies for every budget, and my complete supply list!
