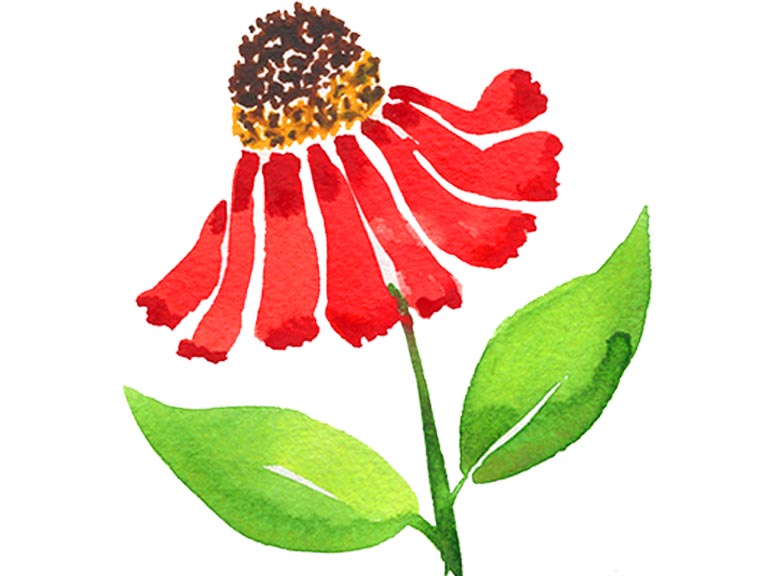
Helenium flowers are so fun and so underrated! I love their flared shape, like a tutu or skirt! They’re very well suited to a loose floral style – here’s my tutorial to create this striking flowers.

Supplies you’ll need
- Watercolour paper (ideally 100% cotton)
- Watercolour paints
- Brushes (medium and small for details, I’m using size 6 and 2)
- Water jars with clean water
- Paper towels or cloth to dry your brushes
Colours for heleniums
You can use any colours for heleniums, but I’m going for a classic red and green combination. As contrasting colours, they make each other pop. You’ll want a lighter green value to avoid clashing with the red.
- Burnt Umber
- Sap Green
- Cadmium Yellow
- Winsor Red Deep
- Cadmium Red
How to paint a helenium – step by step
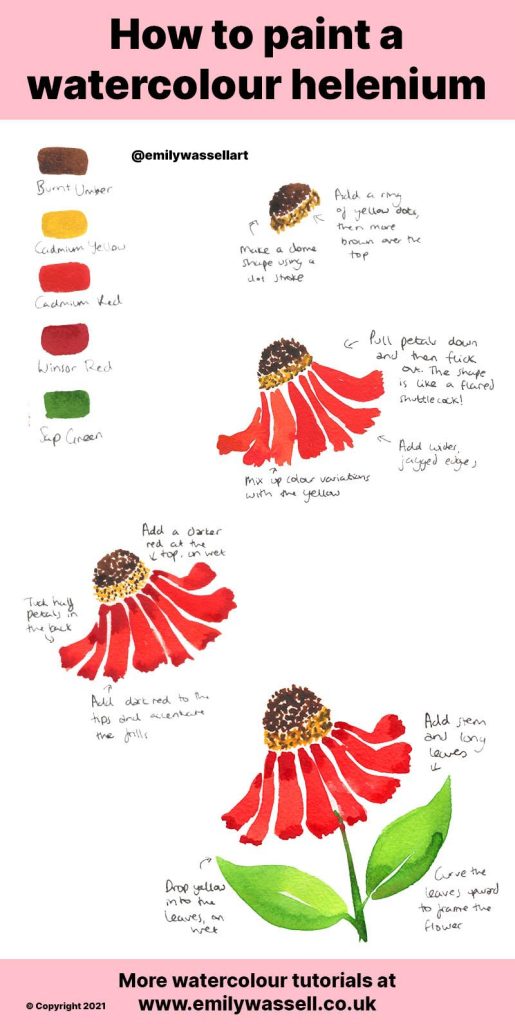
- Begin with the domed centre. Mix up a brown colour and use the tip of a small brush to create a semi-circle of dots towards the top of your paper. Make the dots quite dense and allow them to touch each other, but try and keep some white space.
- Using the same technique, add a layer of yellow dots underneath. Let them touch the brown in areas and blend together.
- Now it’s time for your petals! Mix up a red colour and use your medium brush to pull petals down and away from the centre. The ends of the petals should flare out and have irregular edges.
- Keep the petals separate with white space between them, and change up your red colour as you go – use more water to lighten it.
- When you get to the edges, tuck half petals ‘behind’ the flower by starting the stroke from the centre of the previous petal, and then flaring out.
- Switch back to a small brush and use a dark red to create contrast at both ends of the petal. Touch the inside edge nearest the flower centre, and darken the flared edges. Allow to blend naturally.
- Mix up your green – add plenty of yellow to avoid a harsh contrast with the red. Paint a curved stem coming out from the flower centre, and pull up leaves in a V shape to frame the flower.
- Add contrast in your leaves with darker edges or pops of yellow, and leave a clean white highlight in the centre. For a natural look, start the leaves from different places on the stem and curve the tips back into the flower.
I hope you liked this watercolour tutorial! Find more tutorials below or give me some suggestions for what you want to see next!
