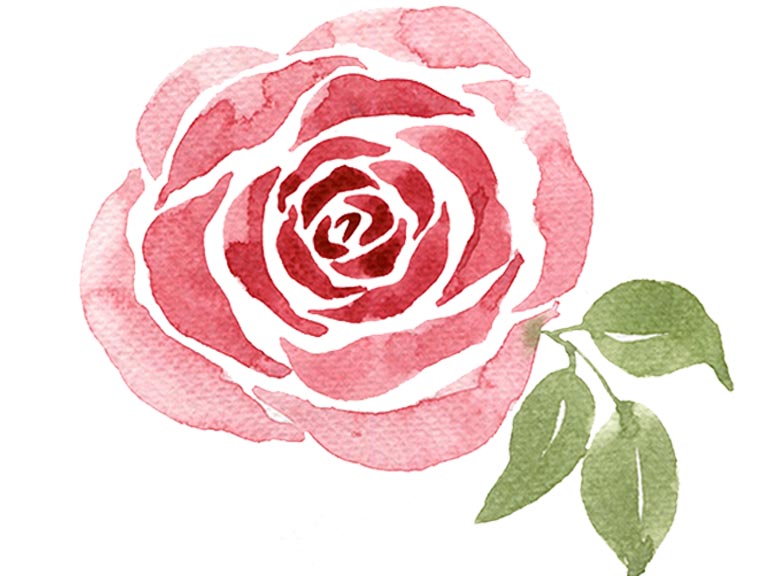
Roses are everyone’s favourite watercolour flowers to paint! They’re the most common request for tutorials I get. And the good news is that they’re super easy for watercolour beginners to paint!
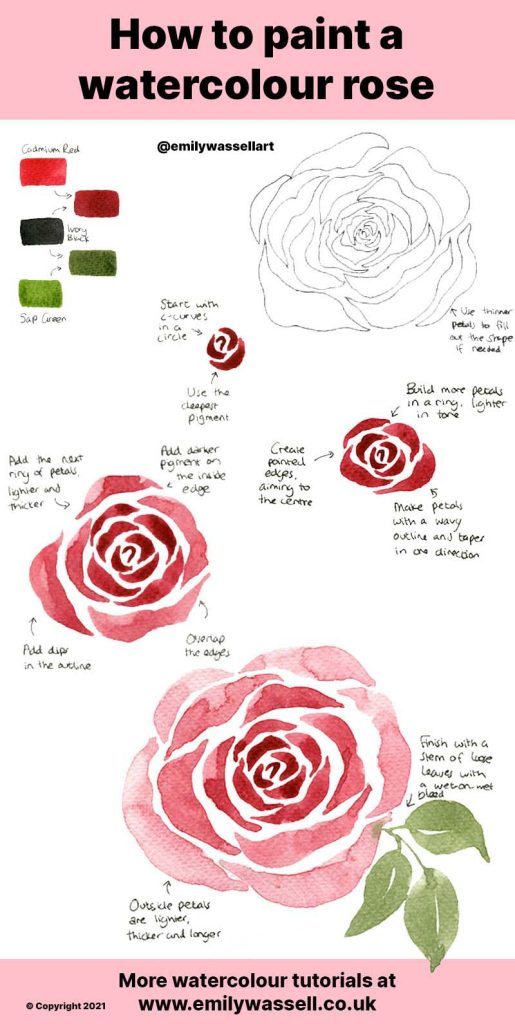
The trick is to get the white space between the petals, to create the separation and avoid making a big circle of colour. Then work on the contrast to make the centre of the rose darker, and the outside petals lighter, thicker and longer.
No matter how loose your strokes are, the rose shape will emerge as you paint!

Supplies you will need
- Watercolour paper
- Watercolour paints
- Brushes (medium round is my favourite)
- Clean water
- Paper towels or a cloth
Paint colours used
I’m using Winsor & Newton Professional Watercolour paints in:
- Cadmium Red
- Ivory Black
- Sap Green
For this rose, I’m mixing a little black into both the red and the green to make more muted colours and make them more harmonious together.
Painting a watercolour rose – step by step
- Sketch out your shape with a pencil if you like – it can make it easier to get the petals all in place. I usually don’t sketch before painting though – it can help to create a loose style.
- Load up your brush with a thick, dark mix of your red colour. Paint c-curves for the centre, moving around in a circle. Keep the shapes small and curvy, and leave white space between them.
- Build more petals into a ring, with a slightly lighter colour. Add water to your mixture to make it lighter. These petals should be longer and less curved – try wiggling your brush a little to create loose edges and taper them into a pointed tip.
- Add more water again to your mixture to make it lighter, and continue out in another ring of rose petals. These should be longer and thicker than the previous petals. Try to overlap the edges of previous petals. Create shadow by adding a little darker pigment to the inside edge and letting it blend out.
- Add lots more water to your mixture and create the final layer of petals. These are again longer and thicker. Make sure you’re tucking the edges in and covering the gaps between the previous layers.
- For the final touches, add leaves in a contrasting green. Make sure it’s a muted green so it’s doesn’t clash with the red or overwhelm it. Curve the shapes to make them appear to hang and leave white space in the centre for a highlight. You can also touch the stems to the rose petals for a pretty watercolour bleed.
Now you have the perfect recipe for a watercolour rose, you can create beautiful floral pieces! Try different colours link pinks and yellows, or add contrast with purples and mauves in the centre. Build it into a bouquet with different coloured roses, or make a floral scatter pattern across your paper.
If you’re feeling romantic, here are 3 ways to paint hearts in watercolour.
Watercolour rose video tutorial
Roses were part of my 7 day loose floral challenge. Watch the video to paint a loose rose in real time with me!
More tutorials
Download my free watercolour supply guide
Feeling overwhelmed and confused by watercolour paints, papers and brushes? Download my free guide filled with insider info, including a list of good supplies for every budget, and my complete supply list!
